

Table of Contents
- What You're Actually Comparing: DIY Giant Coloring Pages vs Professional Sheets
- Materials and Tools Needed for DIY Giant Coloring Pages
- Best Paper for Giant Coloring Pages: Weight, Finish, and Durability
- Large Format Coloring Posters for Kids: DIY Quality vs Professional Finish
- Screen-Free Family Activities: Where Giant Coloring Sheets Fit In
- Cost, Convenience, and Time: An Honest Side-by-Side
- Which Option Should You Choose?
- Conclusion
Last Updated: August 18, 2026
What You're Actually Comparing: DIY Giant Coloring Pages vs Professional Sheets
Giant coloring pages have become a popular screen-free family activity, and most parents face a straightforward question: print them yourself or buy professionally made sheets? At Cherry Creek Lane, we hear this constantly. The honest answer is that these two options are more different than they first appear.

DIY giant coloring pages refers to any method where you produce a large-format sheet yourself, through tiled home printing, a local print shop, or projector tracing. Professional sheets are pre-printed, purpose-designed products that arrive ready to use, sized for tables, floors, or walls.
The gap shows up in image quality, paper durability, setup time, and overall coloring experience. Below, we break down where each option wins, where it falls short, and which makes sense for your situation.
The DIY Route: Tiled Printing and Home Assembly
Tiled printing is the most common DIY method. You divide a large image into letter- or legal-sized sections using software, print each tile on a standard home printer, then tape the pieces together. The result can be impressively large, but seams, color inconsistencies between tiles, and fragile paper weight are real limitations. For a one-time activity where perfection isn't the goal, it works. For a family gathering or classroom where the sheet needs to survive two hours of enthusiastic coloring, it often doesn't.
The Professional Route: Pre-Printed Large-Format Sheets
Professional large-format coloring sheets are printed on dedicated wide-format equipment at resolutions and paper weights that home printers cannot match. They arrive as a single, seamless sheet, no tape lines running through characters' faces, no color banding between tiles. The paper is chosen specifically to handle markers, crayons, and colored pencils without bleed-through.
Materials and Tools Needed for DIY Giant Coloring Pages
Going the DIY route requires more preparation than most guides acknowledge.
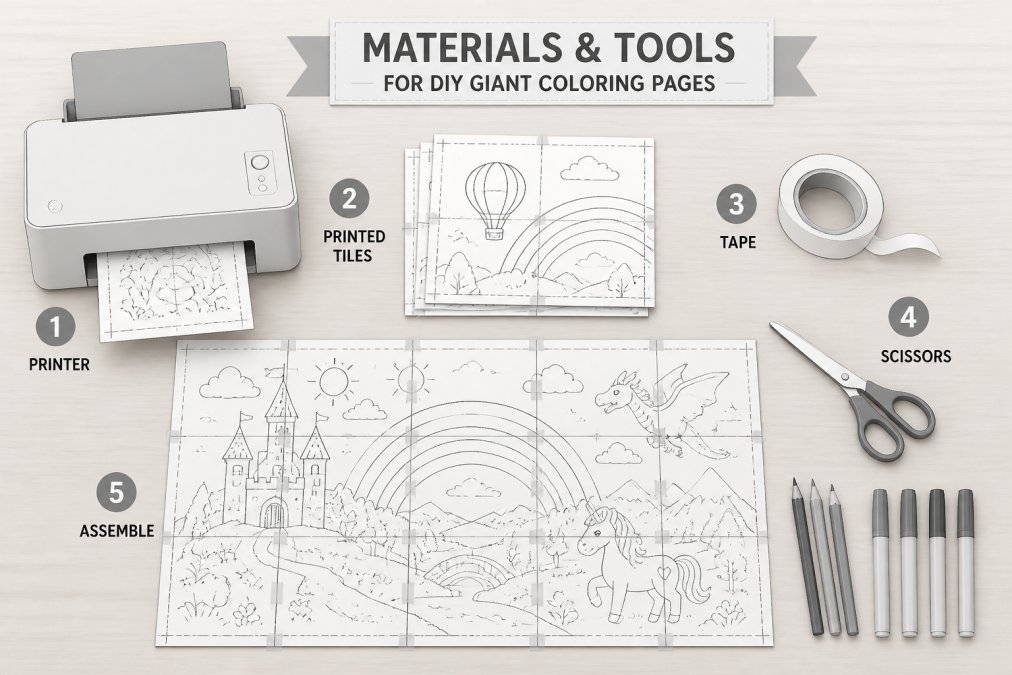
Hardware:
- A home inkjet or laser printer capable of borderless printing
- A cutting mat and straight edge for trimming tile edges cleanly
- Clear adhesive tape or photo-safe mounting tape for seam assembly
Software:
- PDF export capability from your design program (Adobe Acrobat, Canva, or free tools like PosteRazor)
- A vector graphics editor if creating custom designs, since raster images pixelate badly at large formats
- A program that supports bleed settings and crop marks for precise tile alignment
Paper:
- Standard 20 lb copy paper will buckle under markers
- 32 lb or 60 lb text-weight paper handles colored pencils much better
- Cardstock (65-80 lb cover weight) is the closest home-printable option to professional sheets
Resolution and DPI Requirements for Large-Format Output
For a finished sheet in the 24x36 inch range, your source image needs to be at least 150 DPI at final output size. At 72 DPI, which is standard for web images, you'll see visible pixelation. For fine line art with intricate detail, 300 DPI at full size is the professional standard.
A 30x50 inch sheet at 300 DPI requires a source file of 9,000 x 15,000 pixels. Most clip art and free coloring page downloads don't meet this. Vector graphics are strongly preferred for large-format output because they scale to any dimension without losing sharpness.
Step-by-Step Tiled Printing Instructions
- Prepare your source file. Open your image in a PDF editor or tiling software and confirm the source resolution is sufficient for your target output size.
- Set your output dimensions. Define the finished sheet size and set bleed settings of at least 0.125 inches per edge to prevent white gaps at seams.
- Generate tiles with crop marks. Most tiling software (PosteRazor is a free option) automatically divides the image into letter-sized pages and adds crop marks and overlap guides.
- Print a test tile first. Check color accuracy and line sharpness before committing to a full print run.
- Trim edges precisely. Use a cutting mat and metal ruler. Even 1mm misalignment compounds across multiple tiles and creates visible seam gaps.
- Assemble with overlap tape. Align crop marks carefully and use clear tape on the back side of seams to keep the front surface clean.
- Reinforce the back. For sheets used on a floor or taped to a wall, add a second layer of tape along every seam from the back.
Best Paper for Giant Coloring Pages: Weight, Finish, and Durability
The best paper depends on which coloring tools your family uses.
Markers are the most demanding. Standard copy paper allows marker ink to bleed through within seconds. For marker use, you need at minimum 60 lb text-weight paper, ideally 80 lb text-weight or 65 lb cardstock. A smooth finish limits bleed-through better than textured surfaces.
Crayons and colored pencils are more forgiving and work well on 32 lb paper, producing better color saturation on slightly textured surfaces.
For professional-quality results, wide-format printers output onto 60-100 lb coated or uncoated text stock. These papers handle all three coloring mediums without buckling, tearing, or allowing bleed-through.
Eco-Friendly and Archival Paper Options
FSC-certified papers (certified by the Forest Stewardship Council) confirm the wood pulp came from responsibly managed forests. Many office supply retailers now carry FSC-certified copy and cardstock options at comparable prices.
For families who want to keep finished coloring sheets as keepsakes, archival-quality paper matters. Standard copy paper is acidic and will yellow and become brittle within years. Acid-free, lignin-free paper maintains color and structural integrity significantly longer.
Large Format Coloring Posters for Kids: DIY Quality vs Professional Finish
The quality gap between DIY and professional large format coloring posters is most visible at three points: the image, the paper, and the seams.
A professionally printed sheet arrives as a single piece with no tape lines, no color shifts between tiles, and no misalignment issues. The line art is crisp at any viewing distance because it was printed at full resolution on a wide-format poster printer designed for this purpose.
DIY sheets assembled from tiled home printing almost always show seams. Even careful assembly leaves a faint line where tiles meet. Color consistency varies depending on your printer's ink levels and calibration. These aren't dealbreakers for casual activities, but they are noticeable.
DIY produces a functional coloring surface. Professional sheets produce a finished product.
Ergonomic Considerations for Large-Scale Coloring Sessions
A 30x50 inch coloring sheet spread flat on a table requires children to reach across significant distance to color far sections. For younger children, this means leaning forward at awkward angles for extended periods. A few practical adjustments help:

- Position the sheet on the floor rather than a table for younger children, allowing free movement and natural posture changes.
- Rotate the sheet periodically so no child is always reaching to the same far corner.
- For table use, seat children along the long edges rather than at the ends, reducing reach distance.
- Use markers with barrel grips rather than thin pencils for extended sessions, reducing hand fatigue.
For classroom use with mixed-age groups, placing the sheet on the floor and allowing children to move around it freely is the most ergonomically sound approach.
Screen-Free Family Activities: Where Giant Coloring Sheets Fit In
Screen-free family activities have moved from niche parenting philosophy to mainstream priority, and giant coloring sheets occupy a specific and valuable position.
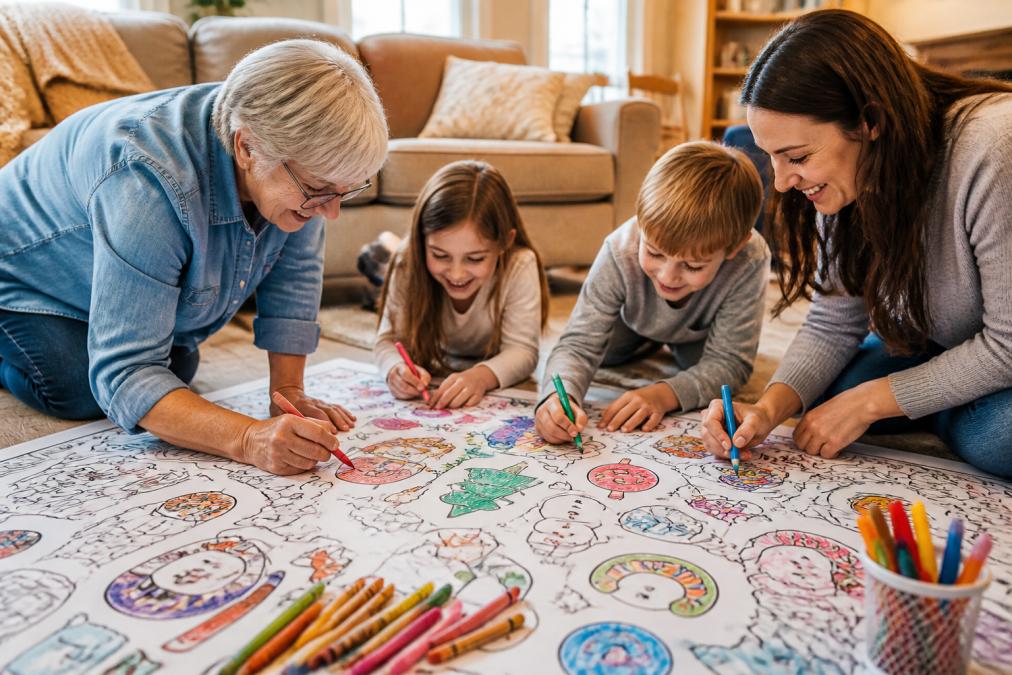
Unlike board games, which require rule-learning and often create competitive dynamics, or puzzles, which have a single correct solution, giant coloring sheets are genuinely collaborative. Multiple people can work simultaneously on different sections. A 3-year-old and a 7-year-old can both contribute meaningfully without one blocking the other's progress.
According to the American Academy of Pediatrics' guidance on play and child development, unstructured creative play supports cognitive and social development in ways that structured, screen-based activities don't replicate. Large-format coloring fits squarely in that category.
Cherry Creek Lane's sheets, which measure 30x50 inches, are sized specifically to work as a shared surface. The ABC 123 Table Size Coloring Sheet and the Giant USA Coloring Map layer educational content into the activity, so children learn geography or letter recognition while coloring.
Cost, Convenience, and Time: An Honest Side-by-Side
| Factor | DIY Tiled Printing | Professional Sheet |
|---|---|---|
| Upfront cost | Low (ink + paper) | Moderate per sheet |
| Setup time | 30-60 minutes | Under 2 minutes |
| Image quality | Variable, seams visible | Seamless, high-resolution |
| Paper durability | Low-medium | High |
| Marker bleed-through risk | High on standard paper | Low on quality stock |
| Suitable for kids under 5 | Fragile assembly | Yes |
| Reusability for display | Unlikely | Possible |
| Custom design flexibility | High | Limited to available designs |
The DIY route wins on customization and upfront cost if you already own a printer. The professional route wins on everything else.
One real-world factor: the frustration cost of a DIY sheet that falls apart mid-session. Tape seams separate. Tiles shift. Thin paper tears. For a birthday party or family gathering where the activity should be relaxing, a failed DIY sheet creates more stress than it relieves.
The Cherry Creek Lane Coloring Club Month-to-Month Plan at $24.99 per month delivers two sheets monthly, roughly the cost of ink and quality paper for a single large DIY print, without assembly time. The Year of Coloring Pages Bundle at $239.88 covers all 12 months at a 20% discount.

Which Option Should You Choose?
Choose DIY if:
- You need a specific custom design not available commercially
- You're comfortable with graphic software and have access to a quality printer or local print shop
- The activity is a one-time, low-stakes event where imperfect seams won't matter
- You have time to prepare and test before the session
Choose professional sheets if:
- The activity involves young children who will be hard on the paper
- You want the sheet to last through a multi-hour session or be displayed afterward
- You're using it for a classroom, party, or family gathering where setup time is limited
- You want consistent, reliable results without technical preparation
The real difference comes down to this: DIY is a project. Professional is an activity. Both have their place, but they require different amounts of your time and tolerance for imperfection.
For most families, the professional option is the better fit. The coloring itself is where the memory gets made, not the printing.
Frequently Asked Questions
Where can I get large-format printing for DIY giant coloring pages?
Office supply stores and print shops that offer wide-format or poster printing are the most common options. You can bring a high-resolution PDF file and request output on paper up to 24 by 36 inches or larger. Alternatively, home tiled printing splits the image across standard letter or tabloid sheets that you tape together. For a ready-made result without any printing hassle, professionally printed giant coloring sheets ship directly to your door at a set size.
Are professional giant coloring pages more durable than homemade versions?
Generally, yes. Professional sheets are printed on heavier stock with consistent ink coverage, which resists marker bleed-through better than standard copy paper. Home tiled prints on 20 lb copy paper absorb moisture from markers quickly and can tear at taped seams. If you use cardstock at home and laminate the seams, durability improves significantly. Purpose-made professional sheets designed for markers and crayons hold up through extended coloring sessions without warping or tearing.
How do I choose the right paper weight for giant coloring sheets?
For marker use, look for at least 60 lb text weight paper to reduce bleed-through; 80 lb or heavier is better. Cardstock at 65 to 90 lb cover weight handles both markers and colored pencils without buckling. For crayons only, standard 20 lb copy paper works, though it tears more easily at large sizes. Professional giant coloring sheets are typically printed on a medium-weight stock that balances portability with durability, making them practical for tables, floors, and walls.
What supplies do I need to create a high-quality DIY coloring poster at home?
You need a vector graphics file or a high-resolution raster image at 150 to 300 DPI at the final printed size. A tiled printing application like Adobe Acrobat's poster print feature or a free tool like PosteRazor splits the image across sheets. Print on at least 60 lb paper, then align pages using crop marks and join them with clear adhesive tape on the back. A projector can replace printing entirely: project the image onto paper or a wall and trace the outlines manually.
What are the benefits of professional giant coloring posters over DIY?
Professional giant coloring pages arrive ready to use with no assembly, no seam alignment, and no risk of pixelation from low-resolution scaling. Print quality is consistent across the entire sheet, and the paper weight is chosen specifically for coloring media. For families who want to sit down and color immediately, the time saved is significant. Professionally made sheets also tend to feature more detailed artwork and cleaner line weights than most home-printed alternatives, which matters when multiple people are coloring the same sheet.
Managing the whole process of sourcing, printing, and assembling DIY coloring sheets takes real time, and the results are inconsistent. Cherry Creek Lane's ready-to-use giant coloring sheets arrive rolled in a mailing tube, sized at 30x50 inches, printed on paper that handles crayons, markers, and colored pencils without buckling or bleed-through, and made in the USA. Shop Coloring Sheets and skip the prep work.
This article was written using GrandRanker