

Table of Contents
- Set Up Your Creative Space to Contain the Giant Coloring Mess
- Protect Your Work Surface Before the Crayons Come Out
- Choose Mess-Free Coloring Supplies for Toddlers and Big Kids
- Large Coloring Posters for Kids: Pick the Right Paper Quality
- Manage Coloring Desk Organization During the Session
- Clean Up Accidental Spills and Stray Marks Fast
- How to Store Giant Coloring Sheets Between Sessions
- Conclusion: Make the Giant Coloring Mess Worth It
- Frequently Asked Questions
Last Updated: September 6, 2026
Set Up Your Creative Space to Contain the Giant Coloring Mess
A giant coloring mess usually starts before the first crayon hits the paper. Managing it begins with choosing where the coloring happens.
A dedicated creative space gives kids permission to make a mess while keeping it contained, using a surface you do not mind getting marked, good lighting, and easy access to cleanup supplies.
Wall-Mounted vs. Floor-Based Coloring
Wall-mounted coloring works well for toddlers who like to stand and for rooms with limited floor space. Tape a large coloring poster to a wall at kid height to keep crayons away from tabletops, though it limits fine motor control compared to a flat surface.
Floor-based coloring suits big kids and group sessions. Spreading a giant sheet on the floor or a table lets multiple children work together. Use a plastic tablecloth or butcher paper underneath to catch pigment transfer.
Protect Your Work Surface Before the Crayons Come Out
The most effective way to manage a giant coloring mess is to prevent it from reaching your furniture. Covering your table or floor with a protective layer turns cleanup into a quick fold-and-toss task.
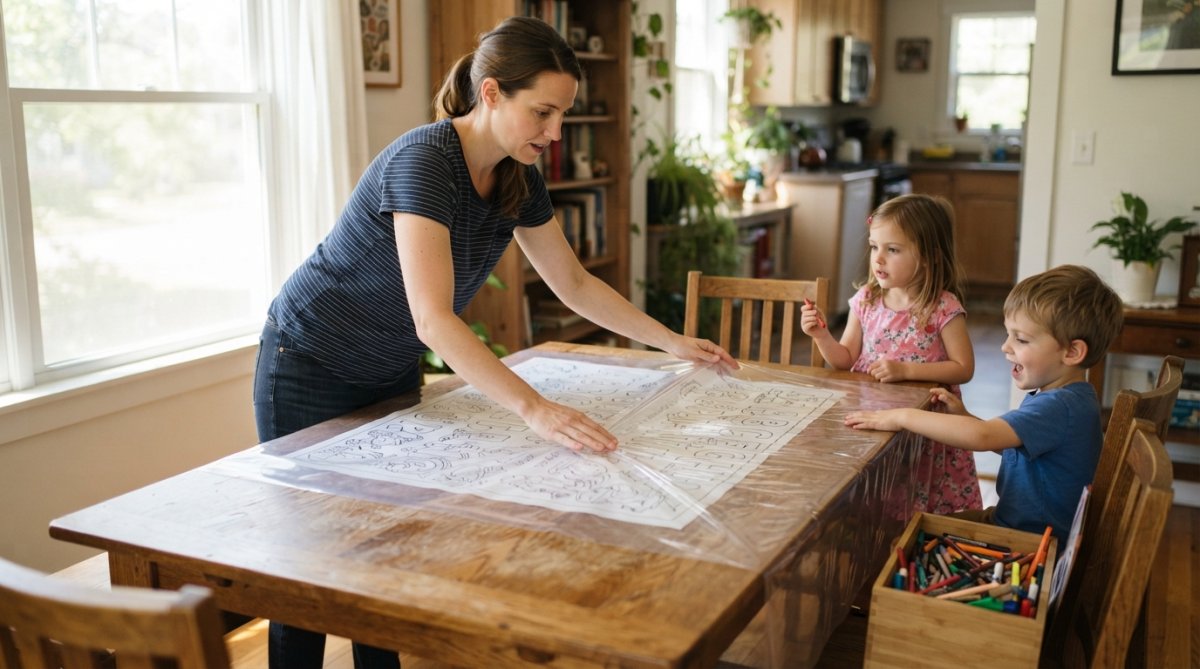
A plastic tablecloth is the single best investment for coloring sessions. It catches stray marks, resists pigment transfer, and wipes clean with a damp cloth. Newspaper works in a pinch but tears easily. For floor sessions, a vinyl tablecloth or cheap shower curtain liner gives the same protection across a larger area.
Washable crayons and markers reduce the stakes considerably. Look for products labeled non-toxic and washable, and test them on your protective covering before letting kids loose (cpsc.gov). A quick test saves you from discovering a permanent stain the hard way. According to guidance on choosing safe art materials for children, checking labels for non-toxic certification is a simple step that prevents both mess and health concerns.
Choose Mess-Free Coloring Supplies for Toddlers and Big Kids
Mess-free coloring supplies for toddlers are not the same as supplies for a seven-year-old. Toddlers press hard, grab with both hands, and test everything with their mouths, so they need chunky crayons that do not roll and washable markers that do not stain.
For toddlers, choose:
- Egg-shaped or triangular crayons that resist rolling
- Washable markers with wide, sturdy barrels
- Crayon rocks for developing pincer grip without breaking
- Smock or old t-shirt to protect clothing
Big kids can handle standard crayons and colored pencils, but they introduce their own mess factors. Set a rule that markers get capped immediately, and keep a small handheld vacuum or lint roller nearby for shavings and residue.
One of the biggest mistakes parents make is giving toddlers the same supplies as older siblings. A three-year-old with a fine-tipped marker will produce smeared ink and broken tips. Age-appropriate supplies prevent most of the frustration before it starts.
Large Coloring Posters for Kids: Pick the Right Paper Quality
The paper quality of your large coloring posters determines how much mess you will manage. Thin paper buckles under marker ink, bleeds through, and tears easily. Thicker paper absorbs pigment cleanly and survives enthusiastic coloring sessions.
Standard printer paper taped together is the cheapest option, but the seams tear and ink bleeds through. A purpose-made giant coloring sheet uses heavier paper that holds up to crayons, markers, and colored pencils without smearing.
Cherry Creek Lane designs its table-sized coloring sheets with this in mind. The ABC 123 Table Size Coloring Sheet ABC 123 Table Size Coloring Sheet turns any table into a giant coloring page on paper thick enough to handle repeated sessions. The I Spy Snow Day and Give Thanks sheets follow the same standard, so you can rotate themes without changing your setup.

Manage Coloring Desk Organization During the Session
Desk organization during a coloring session is about keeping supplies within reach without cluttering the work surface. A giant coloring mess often comes from kids reaching across the sheet and dragging their sleeve through fresh pigment.
Use small cups or a muffin tin to sort crayons by color group, placed at the top edge of the sheet, out of the coloring zone but within arm's reach.
A common mistake is letting kids keep every crayon they own on the table. Limit the session to a curated set of 10 to 15 colors to reduce clutter and stray marks. Rotate the selection each session.
Clean Up Accidental Spills and Stray Marks Fast
Speed is the single most important variable in cleanup. Wet pigment wipes away easily; dried pigment bonds with fibers or pores, turning a two-second wipe into a twenty-minute scrub. Treat every stain while fresh to solve 90% of messes before they become permanent. preventing hand cramps.
The 60-Second Response Protocol
Keep a cleanup caddy within arm's reach of the coloring zone. When an accident happens, follow this order:
- Blot, do not rub. Rubbing pushes pigment deeper into the material. Use a dry paper towel or microfiber cloth to lift the excess pigment first.
- Apply the correct solvent for the pigment type. Crayon wax requires a different approach than water-based marker ink. Using the wrong solvent can set the stain.
- Test on an inconspicuous spot if you are treating a new surface for the first time. A hidden corner of a tablecloth or the underside of a couch cushion tells you whether the solvent will damage the finish or fabric.
- Rinse or wipe with plain water after the pigment lifts to remove any solvent residue.
Surface-by-Surface Stain Removal
Different materials react differently to the same pigment. Here is the breakdown:
Hard, non-porous surfaces (wood tables, laminate, tile, plastic tablecloths):
- Crayon wax: Spray the mark with a multi-surface cleaner containing degreasers, let it sit for 30 seconds, then wipe with a damp sponge. For stubborn residue, a paste of baking soda and water applied with a soft cloth buffs the wax away without scratching the finish.
- Washable marker: A damp microfiber cloth removes most marks immediately. If the ink has dried, spray with a 1:1 solution of white vinegar and water, wait 60 seconds, and wipe.
- Permanent marker: Apply rubbing alcohol (70% isopropyl) to a cotton ball and dab, do not rub, the mark. Repeat with fresh cotton balls until the pigment transfers off the surface.
Fabric and upholstery (clothing, couch cushions, tablecloths):
- Washable marker: Rinse the fabric under cold running water from the back of the stain to push pigment out, not deeper in. Apply a drop of dish soap, work it in gently, and rinse again. Launder as usual. The critical rule: do not put the garment in the dryer until the stain is completely gone. Heat sets pigment permanently (cleaninginstitute.org).
- Crayon wax: Place a brown paper bag over the stain and run a warm iron over it for 10 seconds. The heat melts the wax, and the paper bag absorbs it. Move the bag to a clean spot and repeat until no more wax transfers. Then treat any remaining dye with dish soap and cold water.
- Colored pencil shavings and graphite: Use the sticky side of masking tape to lift shavings off fabric without rubbing them in. For residue, a lint roller picks up most particles.
Carpet and rugs:
- Marker: Blot with a clean white cloth, then apply a small amount of rubbing alcohol. Blot again with a dry cloth. Repeat until the transfer stops. Finish with a damp cloth and blot dry.
- Crayon: Scrape off the excess wax with a dull knife, then place a paper towel over the spot and run a warm iron over it. The towel absorbs the melted wax. Vacuum the area afterward to lift any fibers that flattened.
The Cleanup Caddy Checklist
Stock a caddy once and keep it near the coloring space. A small plastic bin or a repurposed tool caddy works well. Contents:
- Dry paper towels for initial blotting
- Damp microfiber cloths in a zip-top bag
- A spray bottle with 1:1 white vinegar and water
- A small bottle of 70% rubbing alcohol
- Dish soap in a travel-size container
- A magic eraser sponge for hard surfaces only
- A lint roller for shavings and crumbs
- Brown paper bags (flattened) for ironing out wax
When to Call It Quits
Some stains will not come out, especially if they have been through a dryer cycle or sat for days. Accept the loss and move on. A stained t-shirt becomes a painting smock. A marked tablecloth becomes the dedicated coloring cover. The goal of cleanup is to protect your home, not to achieve perfection on every item.
How to Store Giant Coloring Sheets Between Sessions
A half-finished giant coloring sheet is a magnet for mess. If you leave it on the table, crayons pile on top, drinks get set down on the artwork, and the sheet becomes part of the clutter. Storing giant coloring sheets properly between sessions keeps the project safe and the room tidy.
Most advice about giant coloring focuses on the act of coloring itself. Almost nothing addresses what happens when the session ends and the sheet is only half-colored. Half-finished sheets end up crumpled, stained, or torn. A proper storage system solves the problem before it starts.
The Two-Zone Storage System
Separate your giant sheets into two categories: active projects and finished or archived work. Each needs a different storage approach.
Active projects are sheets currently being colored. The worst place for an active sheet is flat on the dining table. Instead, designate one flat storage spot out of the main traffic flow. A flat art portfolio case with a zipper protects the sheet from dust, spills, and pets while keeping it flat. Look for an 18-by-24-inch case, which accommodates most table-sized sheets. A large baking sheet with a lid or flat under-bed storage box works too.
Finished or archived work should be rolled, not folded. Folding creates permanent creases that weaken the paper. Rolling distributes stress evenly across the sheet.
The Roll-and-Tube Method
For finished sheets or long-term storage, the roll-and-tube method is the gold standard:
- Choose a tube. A poster tube with a diameter of 3 inches or larger works best. Smaller diameters force the paper into a tight curl that is hard to flatten later. If you do not have a poster tube, a wrapping paper tube or a paper towel roll works for shorter-term storage.
- Roll the sheet with the colored side facing out. This prevents the pigment from pressing against itself and transferring marks onto the opposite side of the sheet. Roll gently, letting the paper curve naturally rather than forcing it.
- Secure the roll. Use a rubber band at each end, not in the middle. A rubber band in the middle creates a pressure point that can dent the paper. For extra protection, slide the rolled sheet into a large plastic bag before inserting it into the tube, this keeps dust and moisture out.
- Label the outside. Write the theme, the date, and the kids' names on a piece of masking tape attached to the tube. This saves you from unrolling every tube to find the I Spy Snow Day sheet you want to display.
Quick-Break Storage (Under 30 Minutes)
For short breaks, lunch, a phone call, a sibling's tantrum, you do not need a full storage routine. Two options work:

- The clipboard clip method: Clip the sheet to a large piece of cardboard or foam board and lean it against a wall. This keeps the sheet off the table and away from drinks.
- The couch cushion press: Slide the sheet between two couch cushions, flat and smooth. This works only if the sheet is completely dry and no crayons or markers are on top of it. The weight of the cushions keeps the sheet flat without creasing.
What Not to Do
Avoid these common storage mistakes that ruin giant coloring sheets:
- Do not stack heavy objects on top of a flat sheet. Books, toys, or a laptop left on top of an active sheet can emboss the paper with imprints or cause marker pigment to transfer to whatever is on top.
- Do not store sheets in direct sunlight. UV light fades the pigments in crayons and markers, especially over weeks or months. A closet, drawer, or under-bed box keeps colors vibrant.
- Do not roll a sheet that is still damp. If a spill happened during the session, let the sheet dry completely before rolling. Rolling damp paper causes mold and makes the colors bleed.
The Display Option
Some finished sheets deserve more than storage. If your child is proud of a completed sheet, display it with a magnetic clip on the refrigerator or a binder clip on a clothesline. After a few weeks, roll it and store it in the archive tube. This gives the artwork a life cycle: active, displayed, archived.
| Storage Method | Best For | Protection Level | Setup Time | Cost Range |
|---|---|---|---|---|
| Flat art portfolio case | Active projects | High | Instant | $15-$40 |
| Poster tube (3-inch diameter) | Finished or long-term storage | High | 2 minutes | $5-$15 |
| Wrapping paper tube + plastic bag | Between-session storage | Medium | 1 minute | Free (recycled) |
| Cardboard clip board | Quick breaks | Medium | 10 seconds | $3-$8 |
| Under-bed flat storage box | Multiple active sheets | High | Instant | $10-$25 |
| Couch cushion press | Quick breaks under 30 minutes | Low | 5 seconds | Free |
The right storage system turns a half-finished giant coloring sheet from a clutter problem into a work in progress ready for the next session. When the sheet has a consistent home, the giant coloring mess stays contained to the creative space where it belongs.
Conclusion: Make the Giant Coloring Mess Worth It
Managing a giant coloring mess comes down to preparation, not restriction. Set up a contained creative space, protect your work surface, choose mess-free supplies, and keep cleanup tools within reach. When the system is in place, the mess shrinks and the creative benefits take center stage.
The payoff is real. Giant coloring sheets give kids hours of screen-free creative expression, improve focus and motor skills, and create shared moments between siblings, parents, and grandparents. The cleanup is a small price for that kind of connection.
Cherry Creek Lane makes the setup easy with table-sized coloring sheets that are made in the USA, shipped from Utah, and designed for crayons, markers, and colored pencils. With the right paper quality and a simple protective layer underneath, your giant coloring mess becomes a contained, joyful activity rather than a cleanup nightmare.
Frequently Asked Questions
How do I protect my table while using giant coloring sheets?
Lay down a clear vinyl tablecloth or a plastic drop cloth before unrolling the giant coloring sheet. For extra protection, tape the sheet's corners to the table so it doesn't shift. Washable placemats work well for smaller sections if you are coloring with toddlers. A layer of newspaper underneath catches any pigment transfer from markers. This setup takes two minutes and prevents most of the giant coloring mess from reaching your furniture.
What are the best mess-free coloring supplies for toddlers?
Look for washable, non-toxic crayons and markers labeled toddler-safe. Colored pencils require less pressure and produce fewer stray marks than markers. For giant coloring posters, gel crayons glide smoothly and do not dry out as fast. These supplies reduce smearing and make cleanup easier for parents.
How do I store large coloring posters between sessions?
Roll the giant coloring sheet around a cardboard tube or a wrapping paper roll, with the colored side facing inward to prevent smudging. Secure it with a loose rubber band or a piece of twine, never tape. Store the roll upright in a tall basket or flat under a bed. This method keeps the artwork safe and the work surface clear, so the next coloring session starts without a mess.
Are markers or crayons better for giant coloring sheets?
Crayons are the most forgiving choice because they do not bleed through and they wipe off tables easily. Markers produce brighter colors but can bleed through thinner paper and leave pigment transfer on surfaces. If your family prefers markers, choose washable ones and place a protective covering underneath. For toddlers, crayons remain the safest option for managing the giant coloring mess.
The best creative sessions end with stained fingers, proud smiles, and a table that wipes clean in minutes. That is the goal worth chasing. Shop Cherry Creek Lane giant coloring sheets and turn your next family afternoon into a screen-free memory your kids will actually remember. Get started with Cherry Creek Lane and make the giant coloring mess worth every crayon.