

Table of Contents
- Why Giant Coloring Projects Beat Standard Coloring Books
- Project 1: The Table-Top Coloring Station
- Project 2: The Wall Mural Coloring Banner
- Project 3: Theme-Based Group Coloring Activities
- Project 4: DIY Giant Coloring Paper Hacks on a Budget
- Project 5: Trace & Color Learning Sheets
- The Best Markers for Giant Coloring Posters and Crayon Picks
- Cleanup and Storage Tips for Giant Coloring Projects
- Frequently Asked Questions
Last Updated: September 27, 2026
Why Giant Coloring Projects Beat Standard Coloring Books
Giant coloring projects are large-format coloring activities, usually printed on sheets far bigger than a standard coloring book page, that let preschoolers color with their whole arm instead of just their wrist. This guide from Cherry Creek Lane covers five setups you can build this week, most of them with materials you already own. The reason they work so well comes down to one thing: scale.
The Benefits of Giant Coloring Sheets for Toddlers
The benefits of giant coloring sheets for toddlers show up fastest in their hands. Coloring a large surface lets children practice broad arm movements before they ever need fine control, building the shoulder and core strength that later makes handwriting possible. Large sheets also invite siblings and friends to color side by side rather than competing for one small page.
Developmental Milestones Coloring Supports
Coloring supports several developmental milestones at once, which is why early childhood educators lean on it so heavily. Between ages two and three, most children move from random scribbling to controlled marks; between three and four, they start naming what they drew; between four and five, they begin staying inside lines on purpose. A giant sheet gives every stage room to happen without the child running out of space.
Project 1: The Table-Top Coloring Station
A table-top coloring station is the simplest giant coloring project to set up and works for almost any age. You need one large sheet, painter's tape, and a container of crayons or washable markers, taped flat across the table so it covers the whole surface.
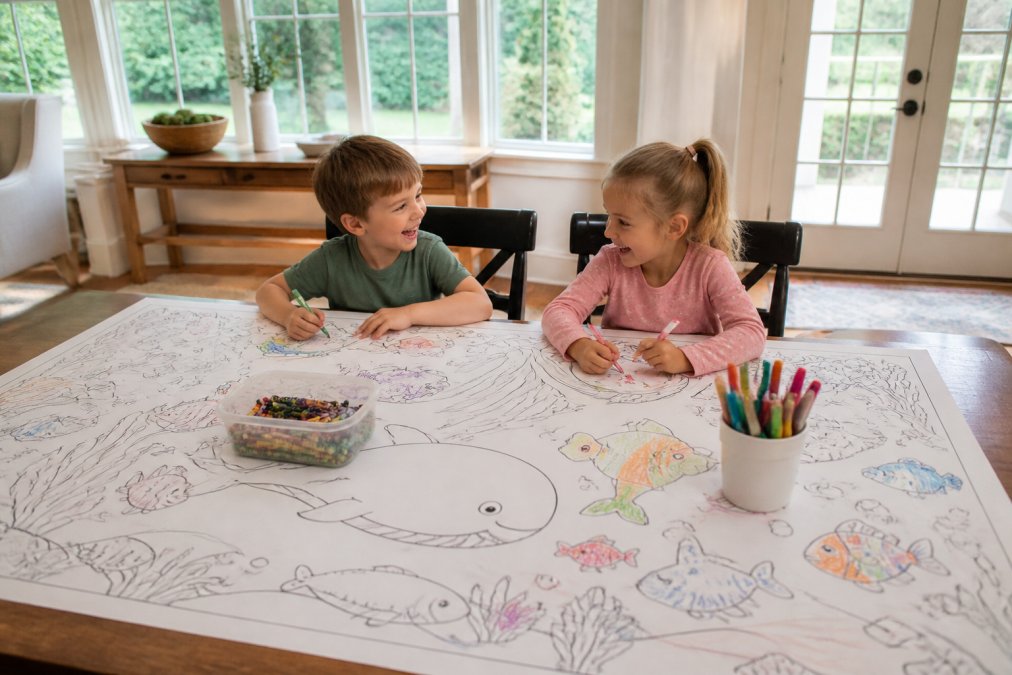
Here is the step-by-step version:
- Clear the table and wipe it down so tape sticks.
- Unroll the sheet and center it on the table.
- Tape all four edges down with painter's tape.
- Set out crayons in a shallow bowl or muffin tin.
- Let the kids choose their spot and start.
Setting Up a Collaborative Coloring Station at Home
A collaborative coloring station works best when you assign space instead of rules. Preschoolers fight over territory, not crayons, so draw a light pencil line down the middle and let each child claim a side, keeping one shared cup of crayons in the center so they still negotiate and share. For mixed-age groups, give the older child a section with more detail and the younger one big open shapes.
Project 2: The Wall Mural Coloring Banner
A wall mural coloring banner turns a blank wall into a group art project. Tape a large sheet to the wall at your child's shoulder height, not yours, a preschooler standing can reach a wider area than one seated, and the change in posture keeps them engaged longer. This setup works especially well for a coloring banner with a repeating pattern, like a row of animals or a long alphabet, and the vertical format encourages kids to squat, reach, and stretch.
Project 3: Theme-Based Group Coloring Activities
Theme-based group coloring activities keep a room full of preschoolers working on the same idea without needing the same page. Pick one theme, then give each child a section that fits it: a farm theme might have one child coloring the barn, another the animals, and a third the garden. Cherry Creek Lane's On The Farm Table Size Coloring Sheets and The Zoo Table Size Coloring Sheet both give you a ready-made theme with enough variety that no two kids color the same thing.


| Project | Setup Time | Best Group Size | Materials Needed |
|---|---|---|---|
| Table-top station | 5 minutes | 2-4 kids | Sheet, painter's tape, crayons |
| Wall mural banner | 10 minutes | 3-6 kids | Sheet, tape, washable markers |
| Theme-based group | 10 minutes | 4-8 kids | Themed sheet, crayons, markers |
| DIY budget hack | 15 minutes | 2-3 kids | Butcher paper, tape, markers |
| Trace and color | 5 minutes | 1-2 kids | Trace sheet, pencils, crayons |
Project 4: DIY Giant Coloring Paper Hacks on a Budget
Budget-friendly DIY giant paper hacks let you test the concept before you buy anything. Butcher paper is the classic option: it comes in wide rolls, takes crayon and marker well, and costs very little per foot. Tape a long strip to the floor or table and draw simple outlines with a black marker, circles, squares, and a few big animals are enough.
Project 5: Trace & Color Learning Sheets
Trace and color sheets add a learning layer to the giant coloring format. A child traces the outline of an animal or shape, colors it in, then practices writing the word underneath, hitting pencil control, color recognition, and letter formation in one activity. Cherry Creek Lane's Jungle Trace & Color Coloring Sheet and Dinosaur Trace & Color Coloring Sheet both follow this trace, color, write structure and measure 30 x 50 inches.
The Best Markers for Giant Coloring Posters and Crayon Picks
The best markers for giant coloring posters are washable, broad-tipped, and low-odor. Crayons remain a great first tool for toddlers, building hand and forearm strength. Markers suit older preschoolers who want saturated color fast, and colored pencils are best reserved for detailed sections on trace and color sheets.
Tip Size, Ink Type, and the Trade-Offs That Actually Matter
Three specifications decide whether a marker works on a giant sheet:
Alphabet Table Size Coloring Sheet →
- Tip width. Broad-line (roughly 5-8 mm) for filling large shapes; fine-line (roughly 1-2 mm) only for outlining or writing practice. Buying fine-line markers for a giant banner is the most common mismatch.
- Washability. "Washable" means the ink is designed to be removed from skin and most fabrics with water and normal washing. "Permanent" and "industrial" markers should stay out of the preschool bin entirely.
- Odor. Low-odor and non-scented markers reduce the chance of a child putting a marker near their mouth to smell it. Scented markers tempt exactly that behavior and are best avoided with children under four.
Non-Toxic Safety Checklist
Before handing any art supply to a preschooler, run through this checklist:
- Look for an "AP" (Approved Product) seal from a recognized toxicology certification body on the packaging.
- Confirm the label says "non-toxic" and "washable"
- Check for a choking-hazard warning on any small caps or parts
- Avoid anything labeled "permanent" or "industrial"
- Store supplies out of reach between sessions
- Supervise marker use with children under three
Cleanup and Storage Tips for Giant Coloring Projects
Cleanup and storage decide whether you will actually do this again next weekend. Giant projects are messier than a coloring book because there is more surface area, more children, and more chance of a marker leaving the paper. The fix is not to prevent every mark, it is to make cleanup predictable and fast. Plan for a five-minute reset, not a twenty-minute one, and the activity stays in your rotation.
Set Up for Easy Cleanup Before Anyone Picks Up a Crayon
The cheapest cleanup is the one you never have to do. Three prep steps cut most of the work:
- Cover the work surface. A plastic tablecloth, a cut-open trash bag, or a cheap vinyl shower curtain under the sheet catches every stray stroke. Washable marker wipes off vinyl with a damp cloth; crayon comes up with dish soap and a little friction.
- Tape the sheet down on all four edges. A sliding sheet is the number one cause of marks on the table and floor, and painter's tape releases cleanly from most finished wood and laminate.
- Put a damp rag and a small trash bowl on the table. Kids can wipe their own hands mid-session instead of tracking color across the room.
What Actually Removes Each Type of Mark
Different supplies need different removal methods, and using the wrong one sets the stain:
- Washable marker on skin or fabric: cold water first, then a normal wash cycle. Hot water can set the dye.
- Washable marker on a hard surface: a damp microfiber cloth, no soap needed. If dried, a little dish soap and warm water.
- Crayon on a hard surface: dish soap and a non-scratch sponge. Crayon is wax, so soap breaks it down faster than water.
- Crayon on fabric: scrape off the excess with a dull edge, then place the stained side face-down on a stack of paper towels and press with a warm iron. Repeat with a fresh towel until no color transfers.
- Marker on a wall: test a hidden spot first. Washable marker usually lifts with a damp cloth; if the paint is flat or matte, use the least water you can and blot rather than rub.
Storing and Displaying Finished Giant Artwork
A finished giant sheet does not have to be thrown away, and the storage method depends on how long you want to keep it:
- Short term (a few weeks): roll it loosely around a cardboard tube, a paper towel tube for smaller sheets, a wrapping-paper tube for a 30 x 50 inch banner, secure with a rubber band, and label with the date and the child's name.
- Long term: lay it flat between two sheets of poster board or inside a large portfolio, and store somewhere dry. Rolling a heavily colored sheet for months can leave permanent creases.
- Display: a strip of painter's tape on the back of a door, the side of the refrigerator, or a low hallway wall lets a child see their work at eye level. Rotate every week or two.
- Repurpose: finished sheets make wrapping paper, placemats cut to size, or gifts for grandparents. A themed banner cut into sections becomes several smaller framed pieces.
The Five-Minute Reset Routine
End every session the same way, and cleanup stops being a negotiation:
- Cap every marker and return it to the bin. A marker left uncapped for an hour may dry out.
- Wipe hands with the damp rag still on the table.
- Roll or fold the sheet and put it where it lives, a dedicated bin, a tube, or the display wall.
- Wipe the covered surface with the same rag.
- Put the bin back on its shelf.
Frequently Asked Questions
What are some simple art projects for preschoolers?
Start with a giant table-top coloring sheet that covers the whole work surface. Add washable markers, crayons, and a few themed stickers. Other easy options include wall mural coloring banners, trace-and-color learning sheets, and collaborative group coloring where each child owns one section. These giant coloring projects need almost no prep and keep little hands busy for an hour or more.
Why are giant coloring projects good for child development?
Large-format coloring builds hand-eye coordination, grip strength, and spatial awareness because children reach across a bigger surface. The oversized canvas also encourages creative development and decision-making about color placement. For toddlers and preschoolers, the physical scale makes fine motor practice feel like play rather than a structured lesson. These benefits of giant coloring sheets for toddlers show up in everyday coloring sessions at home or in a classroom.
What are the best markers for giant coloring posters?
Look for washable, non-toxic markers with broad tips so preschoolers can fill large areas quickly. Water-based formulas clean off tables and hands with a damp cloth. Crayons and colored pencils also work well on high-quality print paper. Cherry Creek Lane's giant sheets are designed for use with crayons, markers, and colored pencils, so you can rotate supplies based on your child's age and grip strength.
Can giant coloring projects work for mixed-age groups?
Yes. A 30x50 inch sheet gives a 3-year-old and a 7-year-old their own space on the same page. Younger children can scribble freely in one area while older kids focus on detailed sections. Collaborative art projects for preschoolers also work in homeschool settings with multiple grade levels because the activity scales to each child's ability without requiring separate supplies.
How do you keep giant coloring projects from becoming a mess?
Lay a washable tablecloth or butcher paper underneath the sheet before starting. Choose washable markers and keep a damp cloth nearby for quick cleanup. After the session, roll the sheet loosely rather than folding it to avoid crease lines. Store supplies in a labeled bin so the next coloring session takes under two minutes to set up.